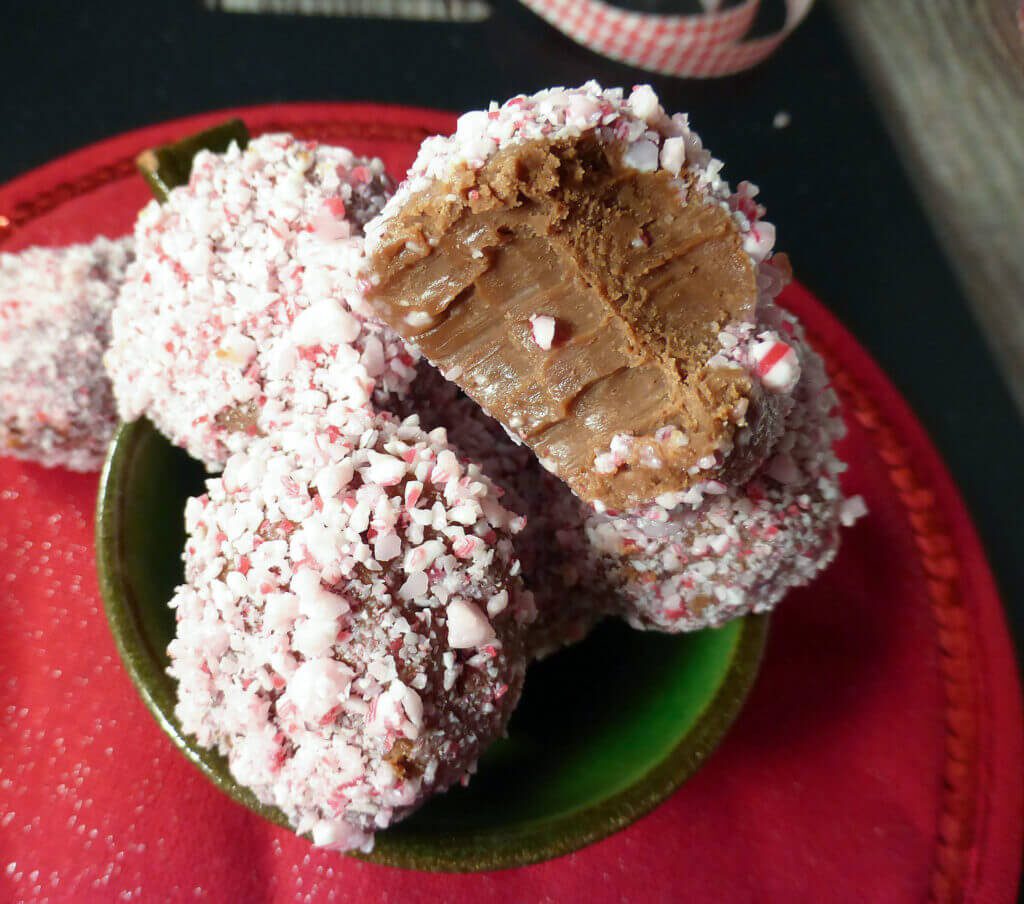
Candy Cane Milk Chocolate Truffles
Homemade candy cane milk chocolate truffles are one of the easiest and most indulgent treats to make at home. With just four simple ingredients: chocolate, butter, cream, and crushed candy canes, you can create soft, homemade chocolates in no time.
These candy cane milk chocolate truffles are perfect for the holiday season, with a peppermint crunch and a little holiday sparkle, all in a recipe that’s so simple to make.
|
|
| My candy cane truffles |
| How to make chocolate truffles |
| Customise your homemade truffles |
| Storage and gift ideas |
| More festive recipes |

My candy cane truffles
I love chocolates, and there’s something thrilling about opening a box of them. The anticipation, the first glimpse of the delights inside, and the delicious quandary over which one to try first. But shop-bought boxes often include a few flavours you don’t love (does anyone like orange or strawberry creams?), which is why homemade truffles are so satisfying: you get to choose the flavours you adore.
Homemade truffles are surprisingly simple. For this recipe, I’ve created a candy cane version, but the coating can really be anything you fancy. All you need to do is melt the chocolate, butter and cream together, then wait for it to firm up a little. Crush up some candy canes, roll the truffles in the tiny pieces, back in the fridge for a bit, and Bob’s your uncle.
The ingredients make 10 good sized truffles. You can scoff them yourself, or give them away as a delicious gift.
How to make chocolate truffles
Chocolate truffles are wonderfully simple, made with just chocolate, cream, and butter. Choosing good-quality chocolate is important, as its flavour will dominate the truffles. Although my candy cane truffles are milk chocolate, you can use a combination of milk and dark chocolate. You could even make white chocolate truffles.
The addition of cream is to soften the chocolate to create a smooth, silky texture, while the butter adds richness and helps the ganache set properly.
Melt the ingredients gently, using a bain-marie or double boiler, stirring frequently to prevent the chocolate from seizing. Once combined and glossy, let the mixture cool slightly at room temperature before chilling in the fridge. This allows the ganache to firm up just enough to handle, while still remaining soft and pliable for shaping.
At this stage, the truffles can be rolled into balls, or kept plain as a base for additional flavours. Small amounts of extracts, spices, liqueurs, coffee, zest, or any other flavourings can be incorporated easily without affecting the texture.
This basic ganache provides a reliable foundation for a variety of truffle recipes. With just three ingredients, it produces rich, creamy truffles that can be enjoyed on their own or customised for festive treats.
Customise your homemade truffles
I’ve made all kinds of different truffles, from gingerbread truffles to healthier avocado truffles. And then we have Sweden’s very own kind of truffle: chokladbollar. Although festive candy canes adorn these ones, you can experiment with all kinds of add-ins and coatings to make them your own.
Once the ganache is smooth and slightly firm, small ingredients can be folded in to add texture or bursts of flavour. Crushed cookies, candied ginger, toffee bits, or dried fruit are all great options. Even small amounts of nut butter or fruit purée can be swirled in for a creamier, more indulgent variation. Just be careful not to add too much liquid, as it can affect the ganache’s consistency.
For coatings, the possibilities are endless. Cocoa powder, finely chopped nuts, or sprinkles all work beautifully. You can also try rolling truffles in desiccated coconut, crushed biscuits, or finely grated chocolate. Combining coatings with subtle flavours inside the ganache lets you create layered textures and tastes, making each truffle a little different and exciting.
The key is to start small and taste as you go, adjusting until you reach the perfect balance of flavour and texture. This approach keeps the truffles manageable while allowing plenty of room for creativity.
Storage and gift ideas
Chocolate truffles are best stored in an airtight container in the fridge, where they will keep for up to two weeks. For longer storage, you can freeze them for up to three months. Just let them come to room temperature for a few minutes before serving.
Homemade truffles are also a thoughtful, luxurious gift that show just how easy it is to create something delicious from scratch. Arrange them in small boxes or festive tins, add a ribbon or label, and you have a homemade treat that looks as special as it tastes.
You can mix different flavours or coatings in a single box for variety, creating a personalised selection for friends, family, or colleagues. If you’re transporting them, keep them cool and avoid stacking layers too high to prevent squishing.

Candy Cane Milk Chocolate Truffles
Ingredients
- 200g (3½ oz) milk chocolate
- 3 tbsp cream
- 1½ tbsp butter
- candy canes (crushed until fairly fine)
Instructions
- Using a Bain Marie (or double boiler) gently melt the butter, chocolate and cream together.
- Stir to combine everything, take off the heat and allow to cool.
- Place the pan in the fridge for an hour or two, just until the truffle mixture has hardened but is still pliable.
- Using an ice-cream scoop or spoon, scoop up the mixture and quickly roll into balls.
- Roll in the crushed candy canes until an even coverage is achieved.
- Pop back in the fridge until you are ready to eat them. Enjoy!