
Princesstårta: Swedish Princess Cake
This Swedish princess cake (princesstårta) is the perfect celebration cake. Using either all-purpose or spelt flour to make the sponge, it is then filled with oodles of whipped cream, jam, vanilla pastry cream and topped off with a marzipan cover.

Some of the links in this post might be affiliate links. Please read my disclosure and privacy policy for more information.
_________
Jump to: |
| What is princesstårta? |
| Ingredients of a princesstårta |
| Adapting the recipe |
| Assembling a princess cake |
| More Swedish recipes |
Swedish princess cake is synonymous with celebration for Swedes. Birthday? How about a princesstårta? Midsummer? Got to be princesstårta! End of school? Yep, you’ve guessed it.
This cake was most definitely made in honour of a special occasion: my son’s graduation from secondary school. My 15 year old, first born, has now finished his compulsory education (although he has several more years of studying ahead) and he asked for this cake to celebrate.
What is princesstårta?
Princesstårta (princess cake) is a fancy Swedish cake that has been a favourite since the beginning of the 20th century, when it was created by the owner of a “housewives” school. There are words used in Swedish to describe cake: kaka and tårta. There is often quite some discussion about when to use which, but the general rule of thumb is to call anything layered, filled with cream, or made for a special occasion, tårta. Whereas, kaka is often referred to plainer cakes, such as sockerkaka or tray bakes like kärleksmums.
Its original name was simply Grön tårta (green cake). Three princesses attended the school, and one of them particularly loved green cake. Due to this, the name was changed to princesstårta. They sell around half a million of these cakes every year in Sweden, especially during holidays or special occasions, like Swedish midsummer.
Ingredients of a princesstårta
The cake has a sweet, airy sponge known as tårtbotten in Swedish (translated as cake case). A tårtbotten can be used for any number of cakes, not just princesstårta. It is made with simple ingredients: butter, eggs, sugar, cornstarch (or, in the UK, cornflour), and vanilla. That’s it.
In Sweden, we can buy these ready made in shops, but most people tend to make their own. The cake is usually baked in one large tin and then sliced into two or three layers.
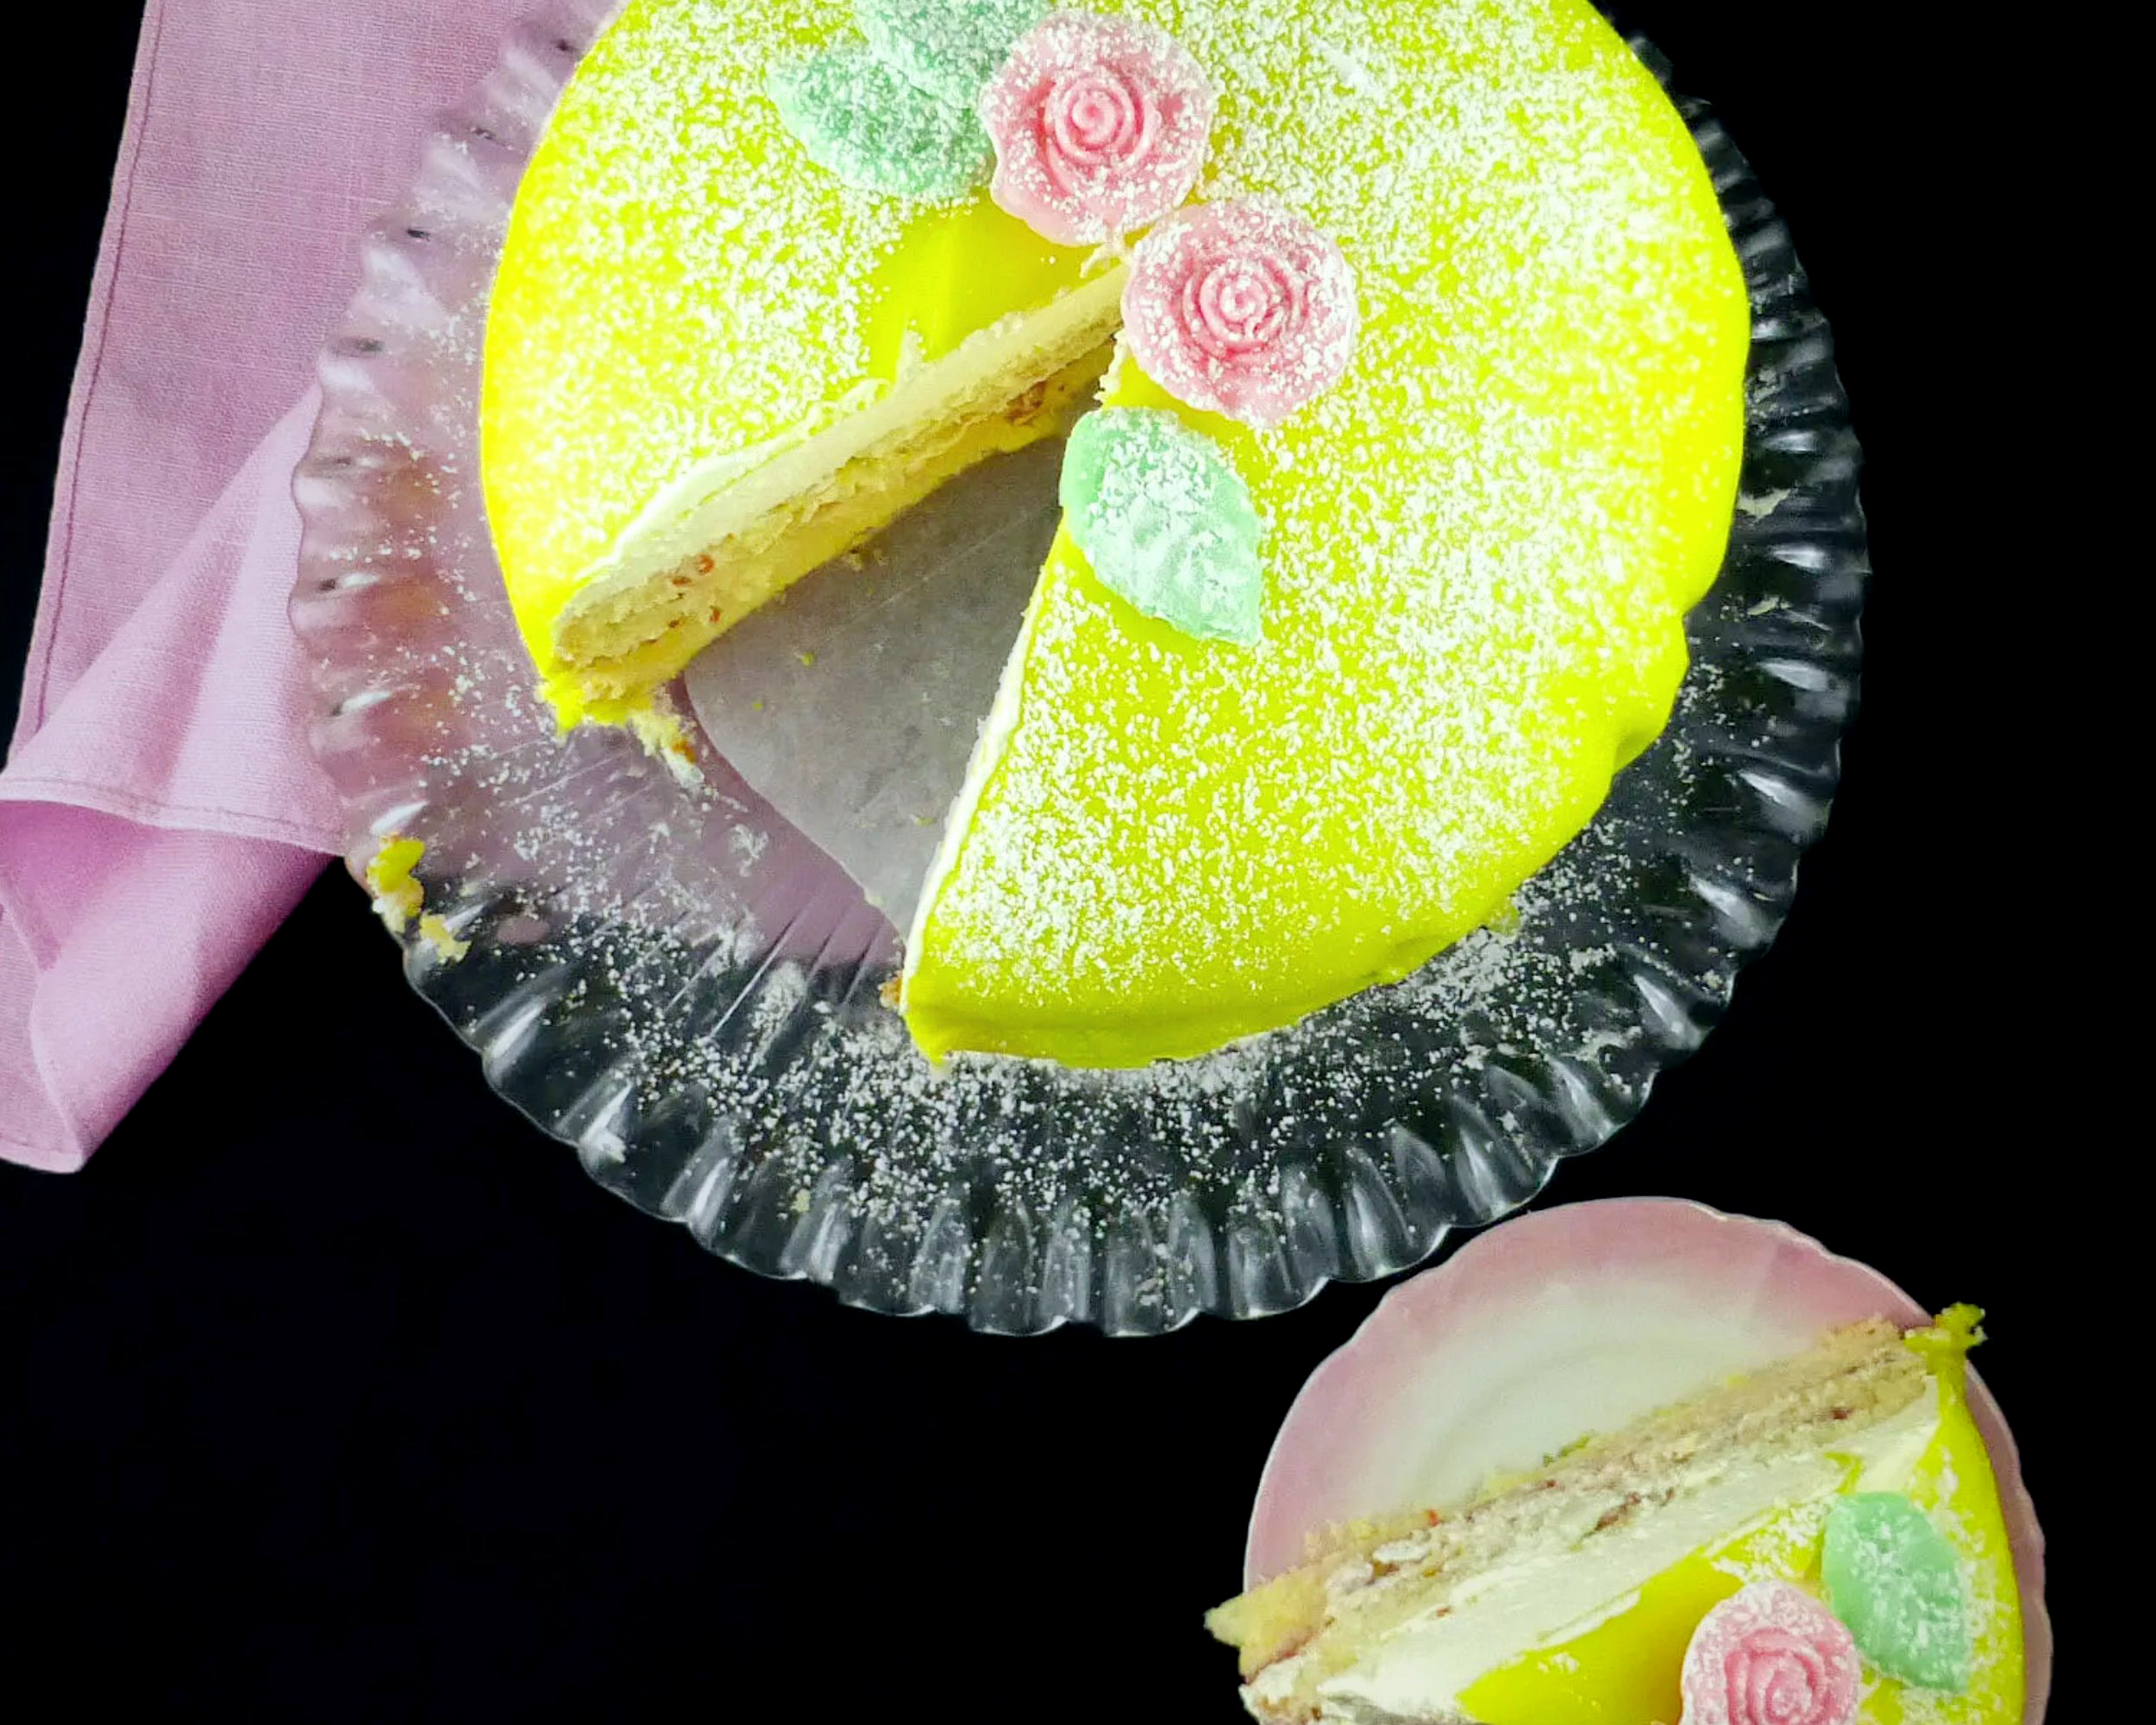
Then comes the cream. Oodles of cream. The cream is an important part in princesstårta as it creates the easily recognisable dome shape of the cake. In addition, the cake has vaniljkräm (crème pâtissière or pastry cream) and jam.
The cake has a marzipan cover. Because princesstårta is so popular in Sweden, you can buy them ready-made in a variety of different colors, usually pastel green, pink and blue. Princesstårta is most often made with green marzipan. Then, all you need to do is just to pop one over the top. The cake is finished off with ready made marzipan decorations, usually pink roses and green leaves.
Adapting the recipe
There are many ways you can adapt the recipe. If you’re not in Sweden, it might be harder to get hold of things like ready made marzipan. However, you can buy marsipanlock (marzipan lid) on Amazon and Swedish online shops, such as Made in Scandinavia. Alternatively, you could always make your own marzipan. Most ready made covers are around 31cm in diameter, so bear this in mind if you make your own from scratch.
A simple, homemade jam with raspberries and sugar is made for more traditional princess cake recipes. This time, I used store bought jam, but have used homemade berry jam in the past. You could also follow the recipe for raspberry sauce in my chocolate and raspberry tartlets. Similarly, if you can get hold of ready made pastry cream, you could always use that instead.
As with the majority of my recipes, which have been tried and tested with different flours, you can use all-purpose flour in place of the spelt.
Assembling a princess cake
Now, there’s a reason why Swedish princess cake is for special occasions. They’re fiddly. Mine was far from perfect, but I was pleased with it. Although the cake can be made in one day, I recommend you make the vanilla cream and sponges the day before you want to eat it. That way, the cake is a little easier to handle and the vanilla cream is thick. Then all you need to do on the day is whip up some cream and assemble.
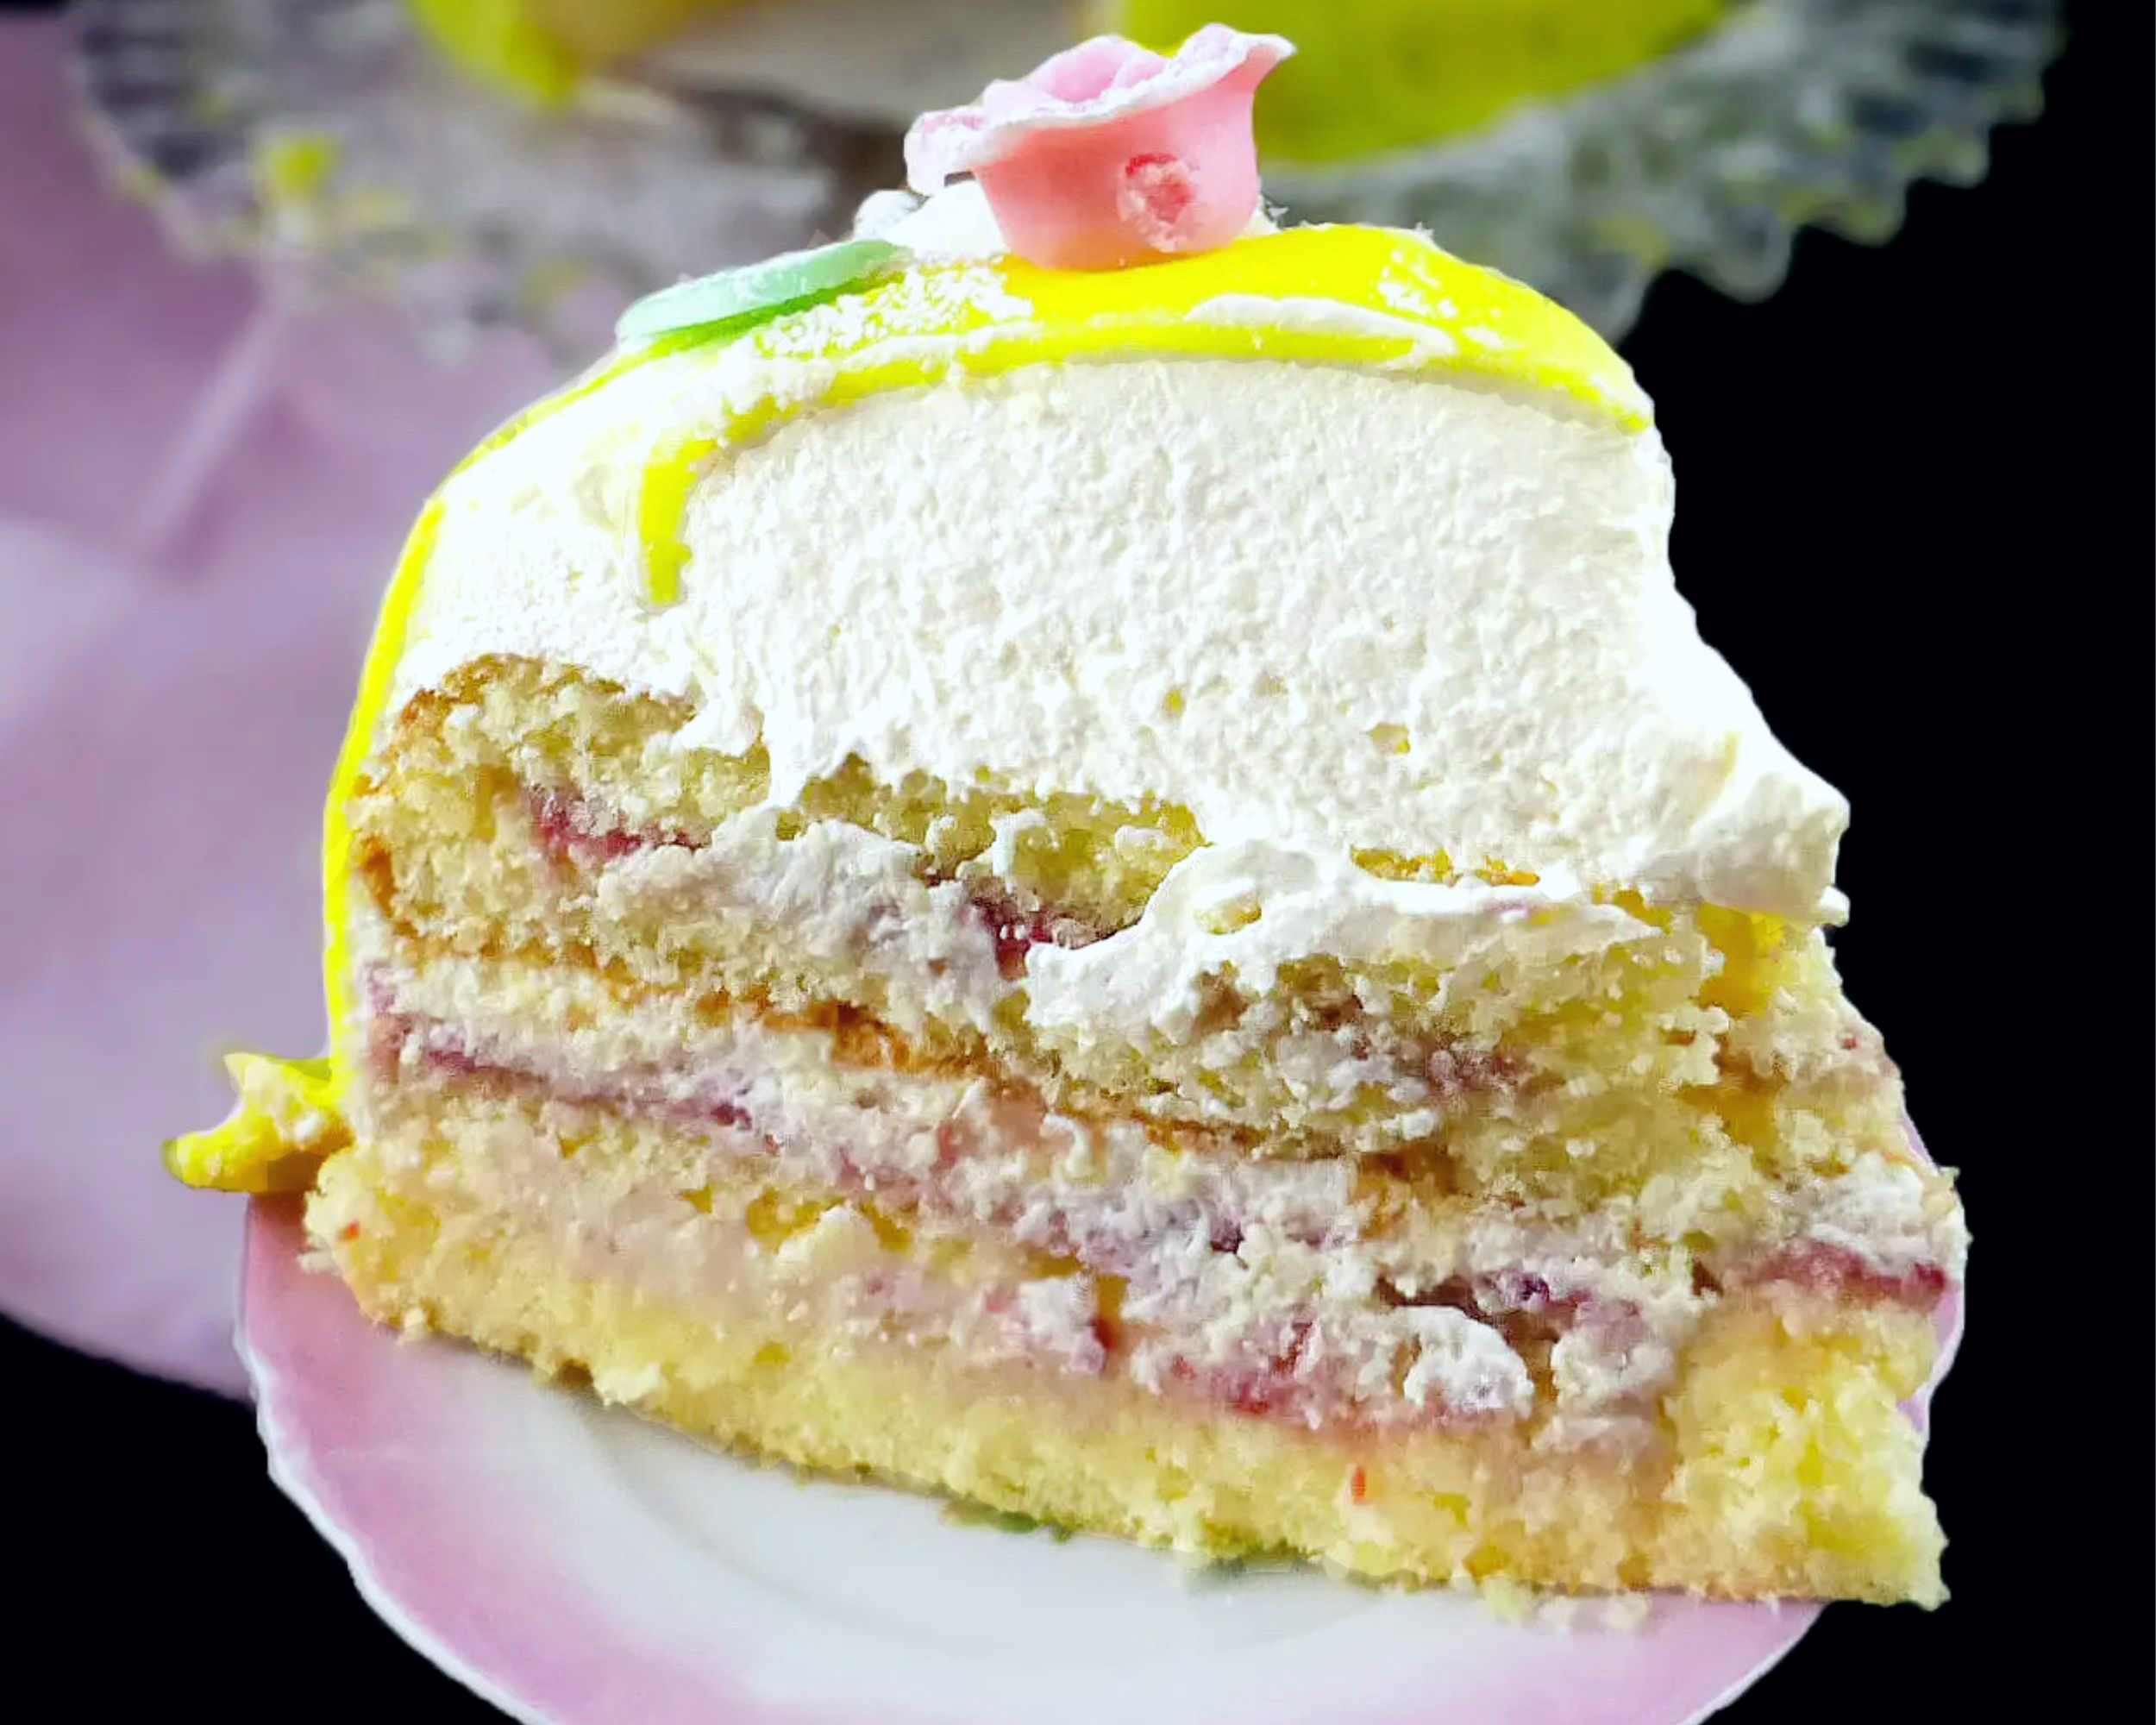
As mentioned, traditional princesstårta usually has three layers of sponge. However, as I was apprehensive about slicing cake (I am unable to cut in a straight line), I decided on making two eight inch cakes. Maybe I need one of those nifty cake slicers? The plan for mine was to cut one of my cakes into two and keep the other whole, but in the end, I went with cutting them both in half. This meant that the traditional three layers became four. As I had four cakes layers, mine stacked up quite high. You can easily follow my instructions using only three layers and it would work out beautifully.
The sponge has fillings of jam, vanilla cream and whipped cream (more detailed instructions are included below). In some recipes, the last layer of sponge is place on top and shaped into a dome, while others use the cream to produce the same effect.
The last stage is placing the marzipan over the top. As I had four layers instead of three, my cake was a quite high. There will never be an occasion where a cake is too high. Right? But, I did run into an issue when trying to fit the marzipan cover. I needed to roll it out a little thinner, almost to the point of tearing. So, if you do go for four layers like me, then this is something to be aware of.
More Swedish recipes
If you have been inspired to find out more about Swedish baking, you will love these recipes:
- Cardamom cream cake
- Caramel apple blueberry smulpaj (crumble)
- Classic Swedish kladdkaka
- Swedish rye and wholegrain spelt bread
- Saffron skorpor (Swedish biscotti)
- Classic kanelbullar (cinnamon buns)
- Kolansittar (Swedish toffee cookies)

Swedish Princess Cake
Ingredients
Cake (see note 1):
- 50g (3½ tbsp) butter
- 4 eggs (medium)
- 150g (¾ cup) sugar
- 75g (⅔ cup) cornstarch (see note 2)
- 70g (½ cup + 1 tbsp) spelt flour (see note 3)
- 1 tsp baking powder
Vanilla Cream:
- 100ml (⅓ cup + 4 teasp) milk
- 100ml (⅓ cup + 4 teasp) cream
- 2 eggs (medium)
- 2 tbsp sugar
- 1 tbsp cornstarch
- 2 tsp vanilla extract
Fillings/Decorations:
- 750-1000ml (3-4 cups) whipping cream
- jam (see note 4)
- marzipan cover (or make your own)
- decoration (see note 5)
- Icing sugar (for sprinkling)
Instructions
Cake (see note 1):
- Pre-heat the oven to 180°C (350℉). Grease two 8" / 20cm pans and line the bottoms.
- Melt the butter and set to one side.
- In a mixer (or whisking by hand) add the eggs and sugar.
- Whisk until the mixture is pale in colour and thickened (this should take about five minutes).
- Sift the flour, cornstarch and baking powder and add to the wet ingredients along with the melted butter.
- On the lowest setting, whisk the ingredients together just until everything is combined (do not overwork). Alternatively, fold in the dry ingredients, if you prefer.
- Divide between the two pans and bake for 20 minutes.
- An inserted skewer will come out clean and the tops will be spongy when ready.
- Set to one side until cool, then remove from the pans. When cold, cover them and leave them until the next day.
Vaniljkräm (Pastry Cream):
- Add all of the ingredients to a pan and heat on a moderate heat, whisking all the time, until the mixture is the consistency of a fairly thick paste.
- Allow to cool before storing in the fridge until use the next day.
Assembly:
- Whisk the whipping cream until thick.
- Cut both cakes into two so you are left with four layers (see note 5).
- Place one layer bottom down on a plate or cake dish.
- Take the vanilla cream and cover the sponge, being careful to not go right up to the edges or use too much (it will squeeze out of the sides when you add the further layers).
- Place the second layer on top and spread over just enough jam to cover the whole cake (again, don't go right up to the edges or use too much).
- Top with some whipped cream, smoothing it over to make it even. Push the cream over the edge of the cake and using a little more, cover the sides of both layers.
- Take a third layer and place on top. Cover with a thin layer of vanilla cream, followed by a thin layer of jam.
- Top with the last layer. Cover the top and sides with cream, smoothing as you go (you need the sides to be as level as possible, but perfection is not necessary). Then, pile more cream on top (in the middle) to create a dome shape. Place in the fridge for a couple of hours to firm up.
- When ready, cover the cake with the marzipan lid. Attach your decoration and sprinkle with icing sugar. Slice and enjoy your celebrations!
Notes
- It is recommended to make the cake the day before intended use, and assemble on the actual day of serving.
- In Sweden, the cake is usually made with potatismjöl (potato starch). However, I didn't have any, so replaced it with cornstarch (cornflour in the UK). You can use either.
- You can use spelt or regular flour for this recipe (just use the same amount).
- I haven't included measurements for the jam, but you will need enough for two layers (use as much or as little as you like). You can use store bought jam, or make your own - for more information read here.
- I bought shop bought marzipan lid and decorations, but you can make your own. For more information read here.
- Traditionally, a princess cake has three layers. However, I decided to divide both sponges, making four layers. For more information read here.

1 thought on “Princesstårta: Swedish Princess Cake”