Chocolate-Filled Overnight Buns
These chocolate-filled overnight buns are deliriously soft, with a pocket of melted milk chocolate. Topped with a simple cocoa icing, you can do all the hard work of preparing the dough the night before, and wake your family up to delicious warm and fragrant buns.
The bread can be made with either spelt or all-purpose flour.
Oh, and if you’re new to spelt flour and still finding your feet, check out my tutorial: A Beginner’s Guide to Spelt Flour.
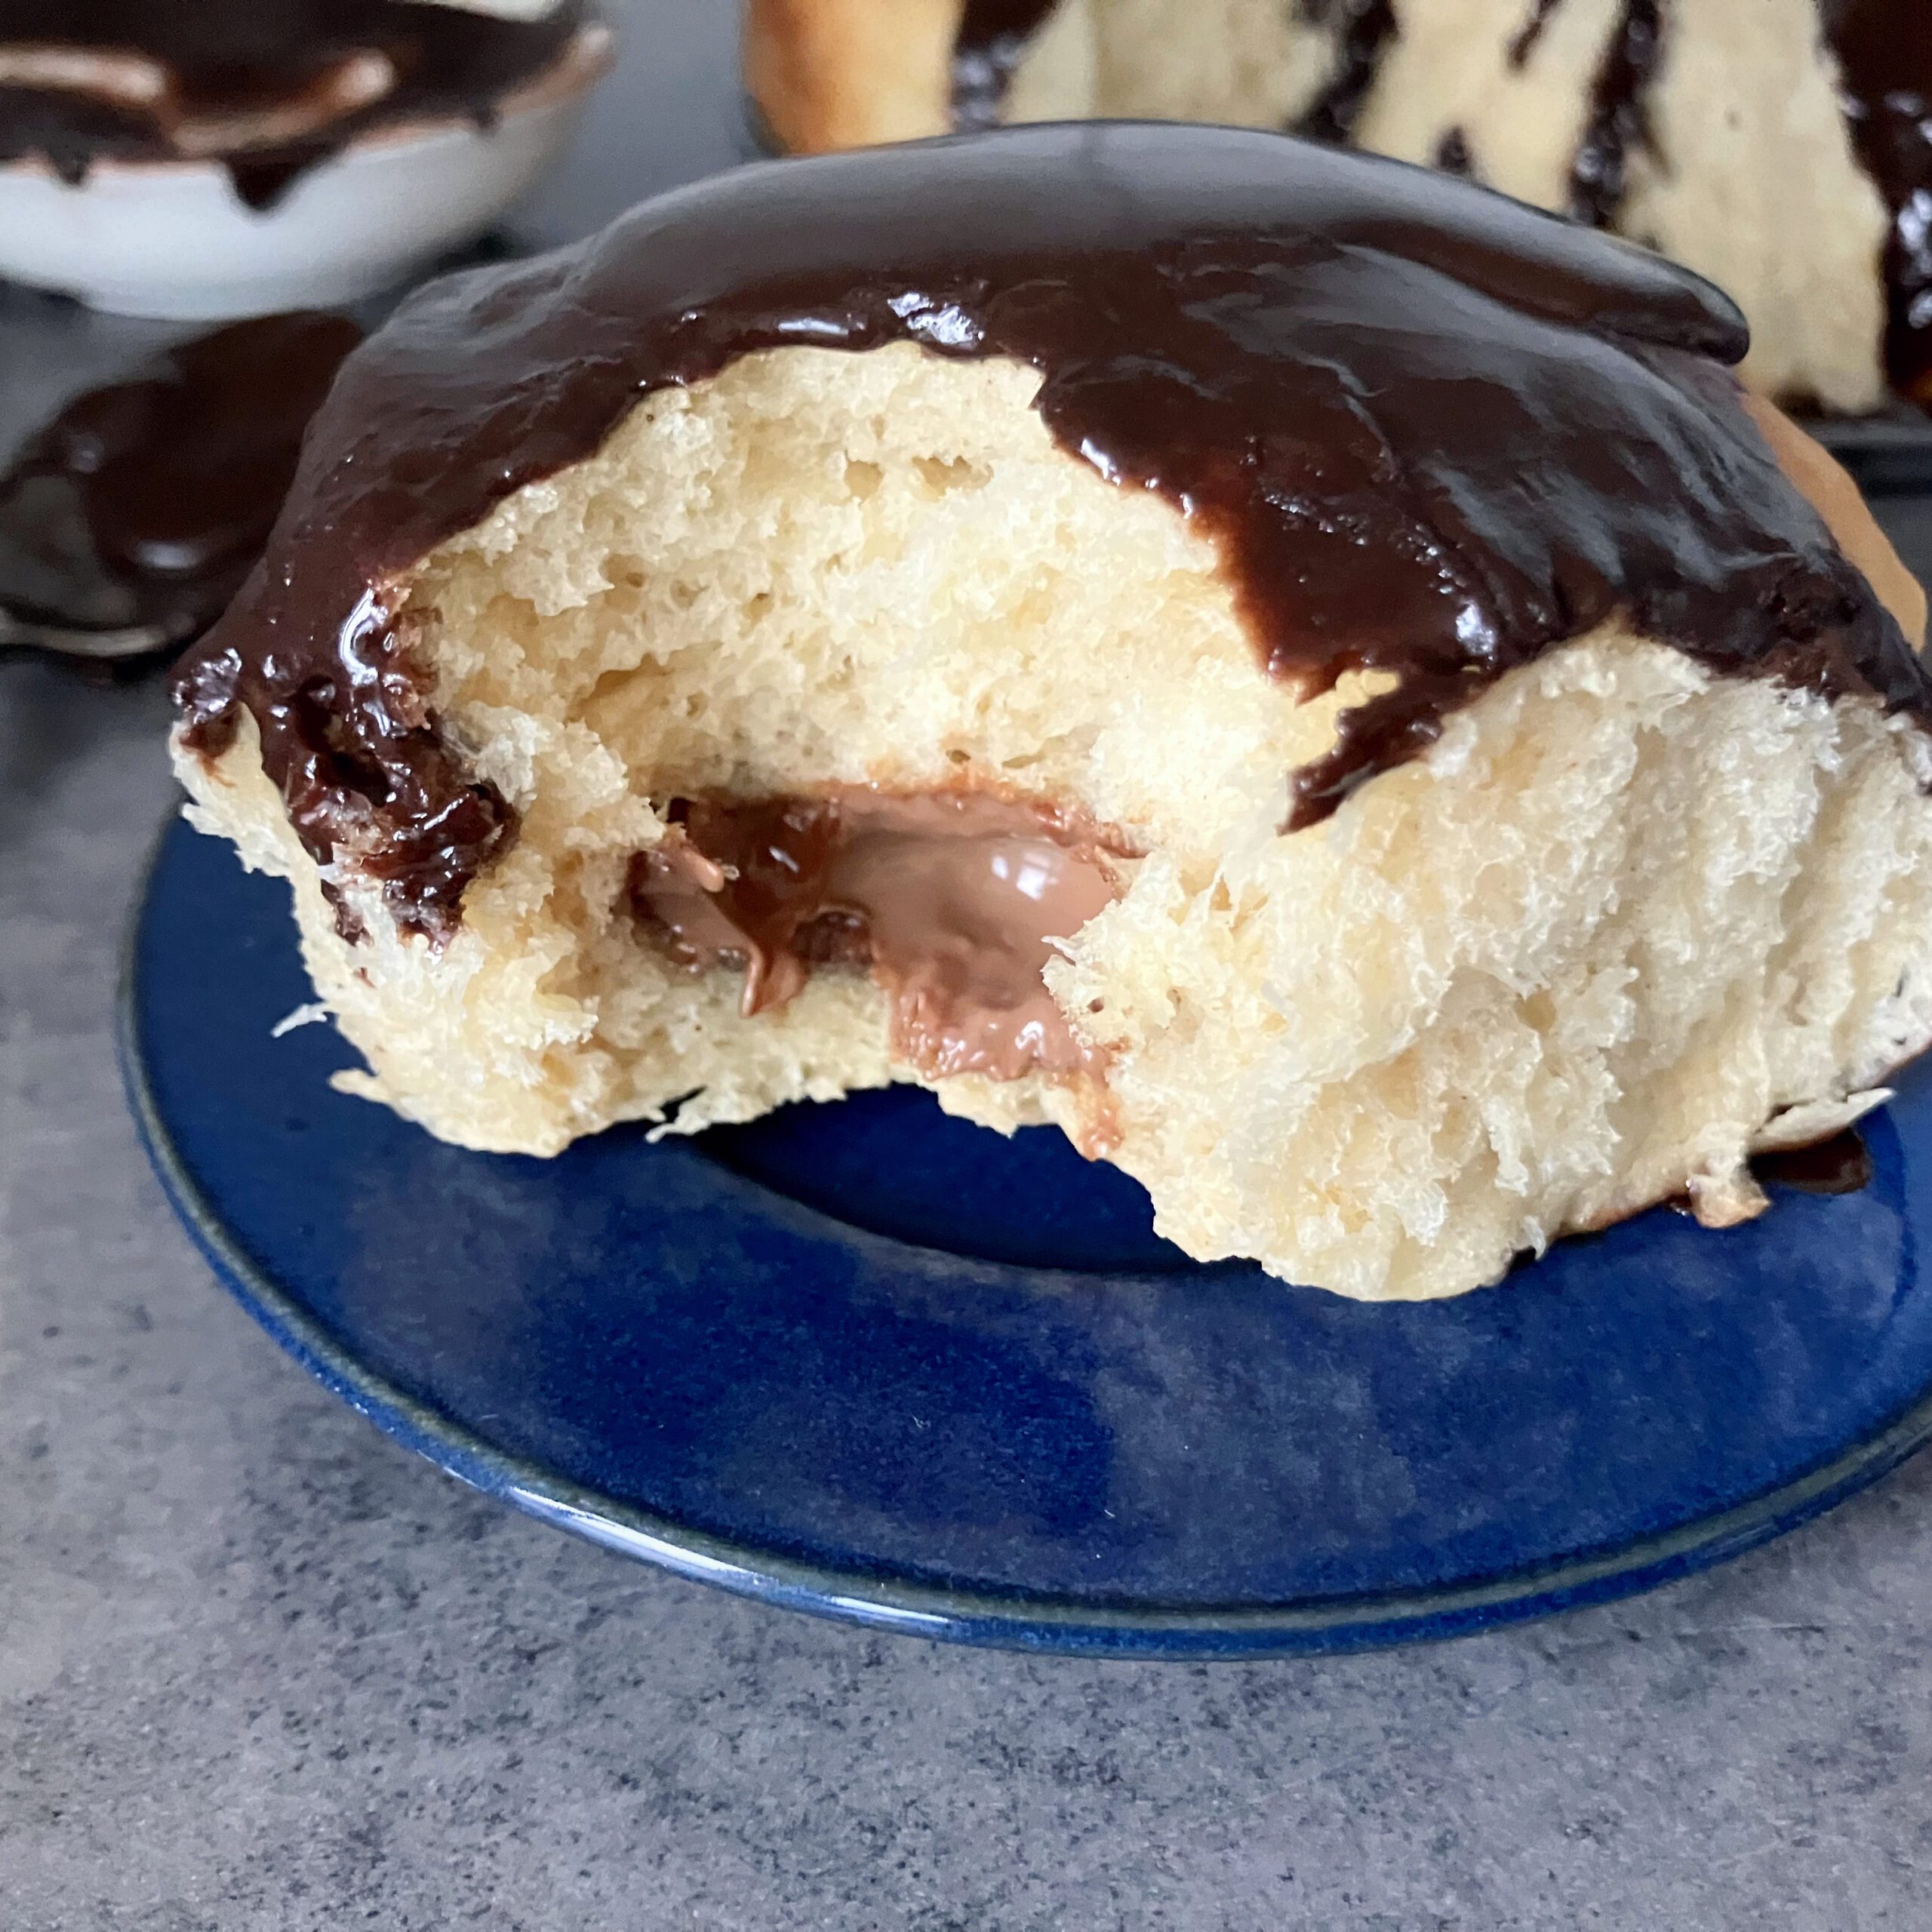

These chocolate filled overnight buns were unbelievably good. Soft, soft, the softest spelt bread ever, with a hidden chocolate centre (that I actually forgot about until I bit into one). So delicious I ate two, one right after the other, still warm from the oven.
I have a feeling that I perhaps say this quite often, but I think these could be my best sweet buns to date.
What is enriched dough?
These (in fact, most of my bread recipes) are made with enriched dough. All bread has a base of flour, yeast, water and salt. A combination of ingredients that has not changed much in thousands of years. And you can make a bloomin’ decent loaf of bread from just those simple ingredients, too. Enriched dough includes the steadfast staples, but has other ingredients added. These are most often eggs, butter, sugar, and milk, but anything that develops the richness of the bread, such as vanilla, chocolate chips, and fruit, can be added.
I started to enrich my dough around the time I began experimenting with spelt flour. As any of you who regularly bake with it will know, spelt can sometimes behave a little differently than regular flour. I found it was often a little on the dry side, and wanted to include ingredients that would soften it a little. One of my earliest recipes was for brioche burger buns, and wanted to recreate that in a soft, everyday bun. The result was one of the most popular recipes on the blog: super soft spelt buns.
Since then, my base dough recipe has always included eggs and butter. Of course, I vary the amounts and add other ingredients into the mix, but I use this recipe to make sandwich loaves, sweet bread, subway bread and hotdog buns.
Types of enriched bread
Think of your most favourite memory of eating buttery, soft bread, and it’s likely you’ve eaten some kind of enriched bread. The most well-known enriched bread is brioche, where additional sugar is added to the dough to give it that familiar slightly sweet taste. Actually, brioche is not classed as bread but falls under the category of Viennoiserie, because it has been laminated in a similar way to puff pastry. Other Viennoiseries include Danish pastries, croissants, and pain au chocolat.
Not all enriched bread is laminated, though. As I mentioned, the term “enriched” simply refers to additional ingredients added to bread dough. Bread like babka, challah, doughnuts and cinnamon buns to name a few. And now, there’s a new enriched bread around these parts: these soft, lightly nutmeg-infused, slightly sweetened, pillows of divinity.
Preparing my enriched dough
In the past, I often preferred to make my dough in a bread machine. This was down to personal preference more than anything, as I am not a fan of kneading dough. However, as my experience of baking with spelt grew, I much prefer using my stand mixer, as it meant I had more control over how much flour to add.
In the past, I would make a deliberate, very sticky dough in the bread machine, and add a lot more after. Over time, I just found better methods to prepare my bread. You will still find my bread machine methods in some older recipes, but I will not be adding it to the instructions of newer breads.
Of course, if you enjoy kneading bread, there is nothing stopping you from making this recipe without the use of any kitchen equipment.
Let the dough rest
If you are planning to shape your enriched dough into something like a babka or roll it out to make sweet buns, it might be a good idea to let it sit in the fridge for a short while. This is not something I always do, but occasionally, I will come across dough that is a little troublesome.
The solution to making sticky enriched dough more manageable is not always to add more flour (although a little may be necessary), as additional flour can change the texture of bread, with the end result denser and drier than you would perhaps like.
Enriched dough might need a longer rise
Although not always, enriched doughs sometimes need more time to proof. Another absolute perk of using a bread machine to prepare dough is that it takes care of the proofing very well. I have never come back to rising dough to find that it hasn’t, well, risen.
As with all bread, the “doubled in size” rule still applies. So, just keep an eye on it, checking the progress regularly. Over-proofing can be as disastrous as under-proofing, as I discussed in my post Wholegrain spelt: Which bread machine cycle is best?
Allowing enriched dough to have a second rise overnight in the fridge really helps to develop a richer, more complex, flavour. Not only that, it produces a softer, more pillowy texture. Perfect for these sweet buns.
Enriched breads, particularly those made with spelt flour, can be a little more delicate, and it helps if the dough is baked in some kind of pan. This helps support the sides and allows the bread to hold its shape, which worked beautifully for this recipe.
Enriched dough can be on the delicate side
Making bread is a chemical reaction, often producing counteractive results. A good example is the butter in enriched dough. It coats gluten strands, allowing for softer bread. However, this also causes the gluten to weaken.
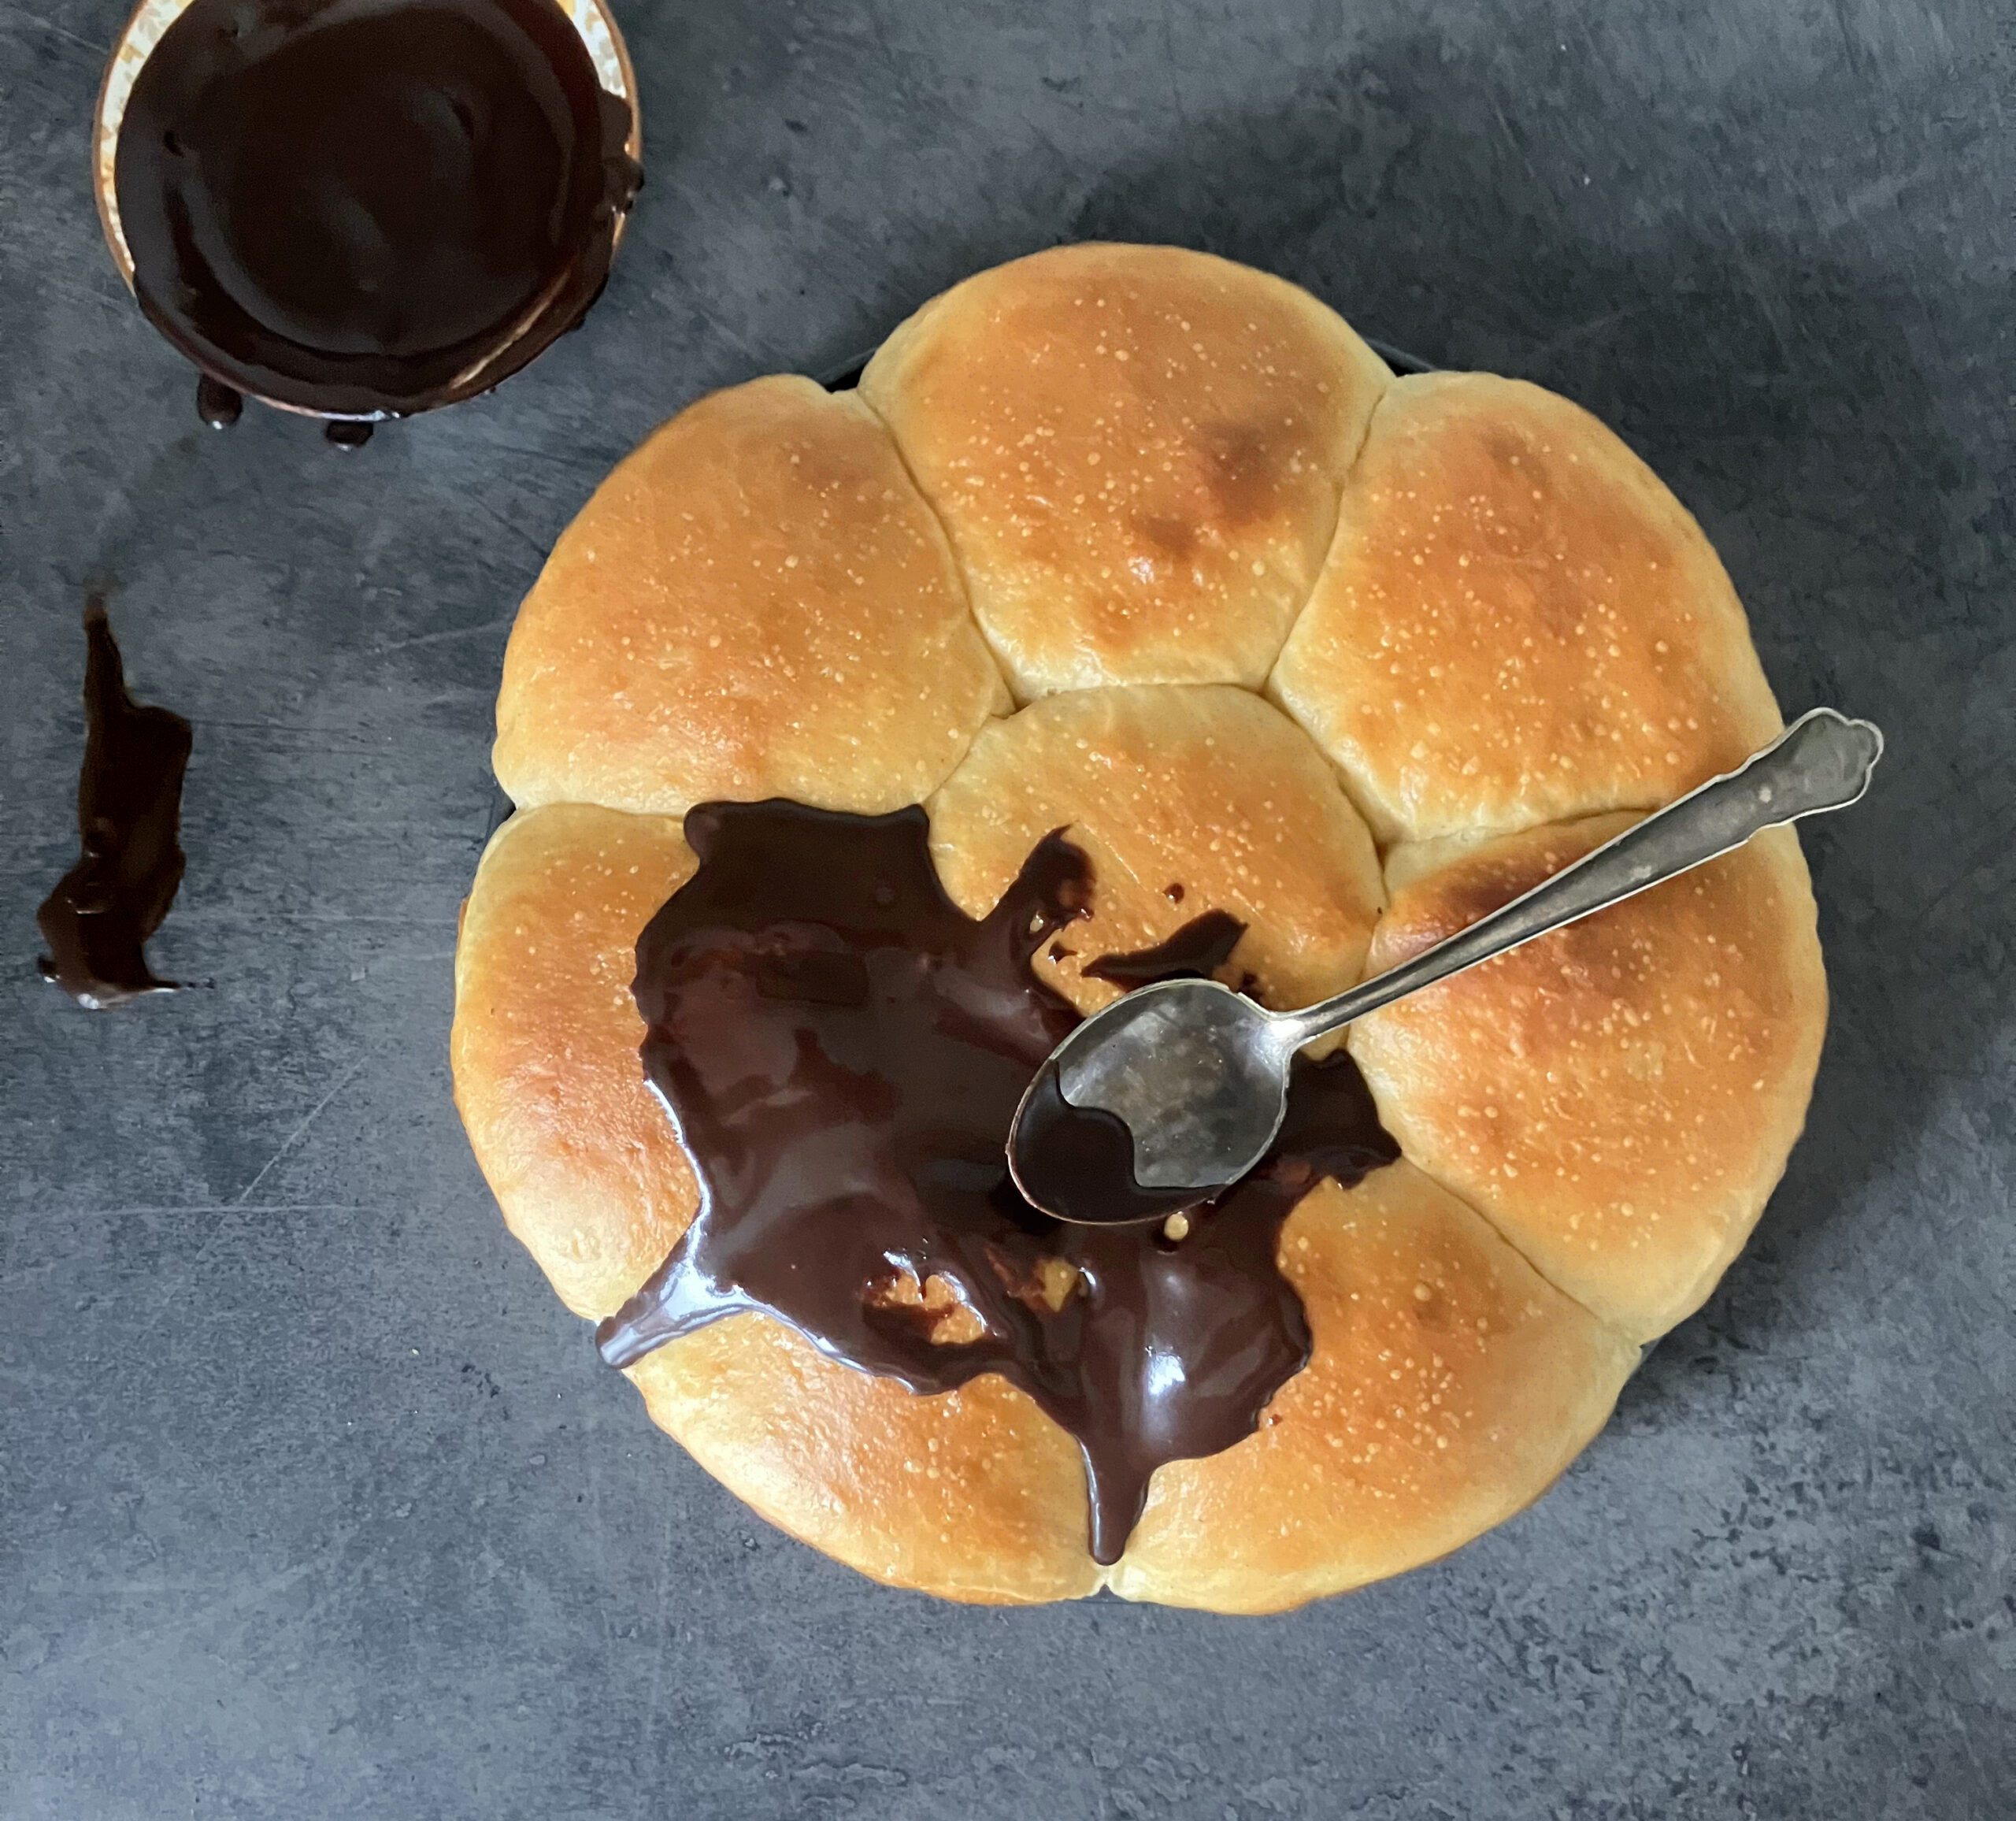
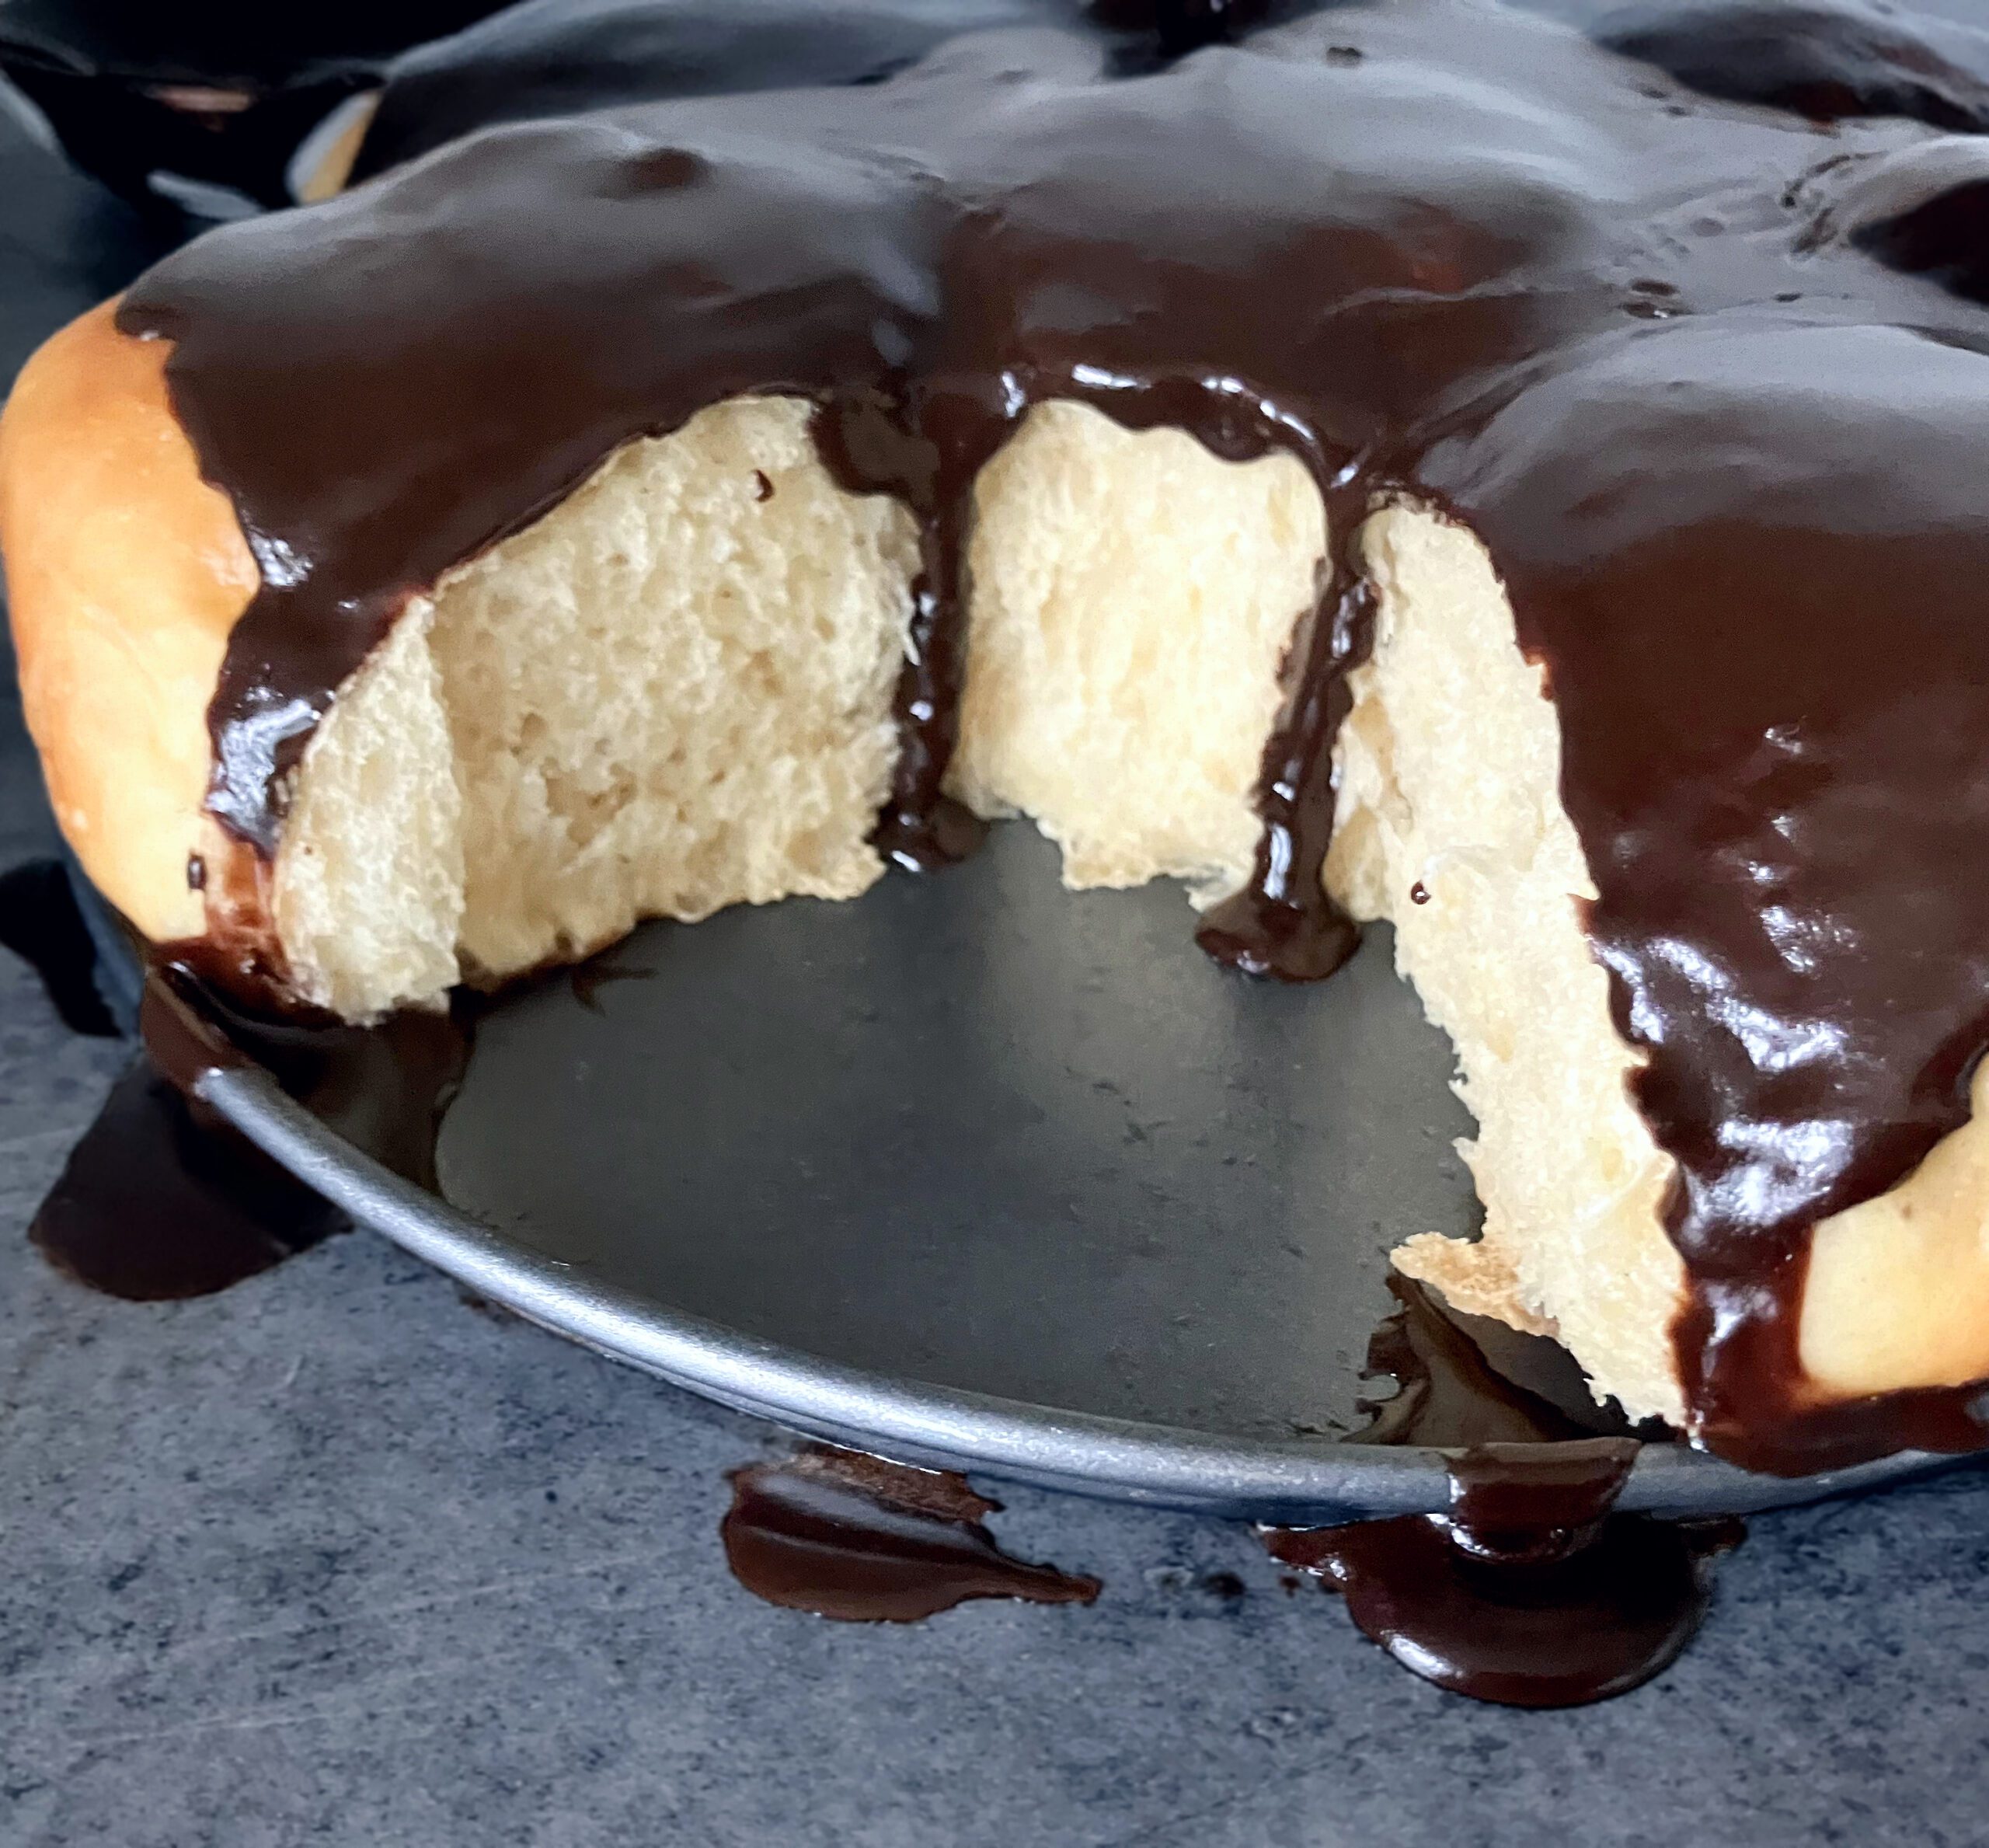
Enriched dough packed with butter, eggs, and sugar, is often heavier, and if not handled correctly, can cause bread to collapse. A good way to help prevent this is to use some kind of bread pan, as this supports the bread not only as it rises but while it bakes. My chocolate-filled overnight buns were placed in a round springform pan, which allowed them to hold their shape beautifully.
Spelt or all-purpose/plain flour?
I do say this on pretty much every post I write, but if you are new around these parts, you probably haven’t heard it. Spelt flour is my flour of choice, mainly because it is gentler on my tummy than regular flour. The great thing about it is how adaptable it is to use. You can swap out all-purpose flour (also known as plain flour) and substitute it with spelt in pretty much anything. So, that makes it very easy to adapt this recipe to use any flour you like.
Simple chocolate icing
I am a big fan of melted chocolate, cream cheese frosting or ganache topping my sweet bread. This time, I wanted to recreate the kind of chocolate icing we have on some pastries here in Sweden. It is not something very common, but we used to eat them when my kids were little and we stayed at their grandparents’ summer house.
My icing is just a simple combination of icing sugar, cocoa and milk mixed together. But it is just perfect for this recipe. It’s sweet, but complements the soft, fragrant buns beautifully.
My goodness, these buggers were messy to ice. Or should I say, messy to handle after dolloping on the rich, yet simple cocoa icing. I got a little excited about eating them, so poured over the icing before the buns were completely cool. It went everywhere. Especially around my mouth. It looked like an explosion in a chocolate factory in my kitchen. And yet, despite the mess, I am glad I did. The buns need to be eaten warm. They really do. And what’s a little runny icing between friends?

Raspberry and cream cheese braid
Cinnamon bun monkey bread (from scratch)
Coffee cinnamon overnight buns
Raspberry and vanilla overnight buns
Chocolate-Filled Overnight Buns (with a simple chocolate icing)
Ingredients
Dough:
- 150ml (⅔ cup) milk
- 50g (3½ oz) butter
- 1 egg (medium)
- 240g - 320g (2-3 cups) spelt flour (see note 1)
- 7g (2¼ tsp) yeast (see note 2)
- 2 tbsp brown sugar
- ½ tsp cinnamon
- ⅛ tsp nutmeg
- 1 tsp salt
Egg Wash:
- 1 egg (small)
Filling:
- milk chocolate (see note 3)
Icing:
- 1 tbsp milk (see note 4)
- 1½ tbsp cocoa (see note 4)
- icing / confectioners' / powdered sugar
Instructions
Dough:
- Gently heat the milk in the microwave until just lukewarm (around 37–40°C / 100–105°F). Stir in the butter until melted.
- Add the milk and butter mixture to your stand mixer bowl along with the egg.
- Then add 240g (2 cups) of flour and the remaining dough ingredients. Mix until combined.
- Gradually add extra flour as needed, one tablespoon at a time, allowing it to incorporate fully before adding more. Be careful not to add too much, as this will make the bread dense.
- After a few minutes, the dough will start to pull away from the sides of the bowl. You may notice your machine working a little harder (mine starts to make a clumping sound). The dough will still be sticky and will drop easily from the paddle.
- Using a spatula, scrape the dough from the paddle. Add a little more flour and continue kneading until the dough pulls completely away from the sides of the bowl and most of the bottom. It will no longer drip from the paddle but should come away easily when pulled. The dough should feel tacky, but not stick to your fingers.
- Cover the dough and leave it to proof in a warm place until it has doubled in size, usually 60–90 minutes.
- Knock back the dough and knead briefly on a lightly floured surface.
- Divide the dough into eight equal parts (use scales to ensure they are as close in weight as possible).
- Taking one piece of dough at a time, roll it on your surface until you have a round ball.
- Roll each ball out into a circle and place a chunk of chocolate in the middle.
- Pull the dough up over the chocolate. Give it another little roll until it's as round as possible, then place in the centre of a greased, round springform pan (mine is 20cm / 8").
- Continue with the remaining dough balls and place them around the ball in the centre (leaving a little space in between them).
- Cover well with clingfilm and place in the fridge overnight.
- The next morning, take the buns out of the fridge, cover them with a tea towel, and let them sit on the counter until they come up to room temperature.
- Pre-heat the oven to 175℃ (350℉).
- Beat the egg and then liberally brush over the top of the buns.
- Bake for around 20 minutes, until the top is nice and golden.
Icing (see note 4):
- Mix the milk and cocoa together, then gradually add as much icing (powdered) sugar as you like. The more you use, the thicker the icing.
Notes
- You can use all-purpose or even bread flour in place of the spelt. Just use the same measurements as specified.
- In Sweden, we have something called dried yeast. It is used both in warm liquid to proof and also added directly to flour. I am aware that the US has two options for dried yeast, and I believe instant yeast is the most similar for the purpose of making this particular bread.
- I used regular milk chocolate in the buns. I broke it into chunks and placed one chunk inside each bun. However, you could use two chunks, if you preferred. Alternatively, you can use dark or white chocolate in place of the milk chocolate.
- You can use more cocoa for a richer icing. If you would like to have more icing, just double the recipe. The amount of icing sugar has not been specified because you may prefer a thicker consistency than I used (mine was quite runny when the bread was warm, but hardened a little as it set).