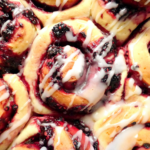
Blackberry Skillet Overnight Buns (Bread Machine)
Servings: 8 buns
Ingredients
Blackberry Filling:
- 200g (7 oz) blackberries (fresh or frozen)
- 1 tsp vanilla extract
- 2 tbs sugar
Dough (see note 1):
- 250ml (1 cup) milk
- 1 egg (medium)
- 50g (3½ tbs) butter (chopped into small pieces)
- 1 tbs olive oil
- 400-450g (3⅓ - 3¾ cups) spelt flour (see note 2)
- 4 tbs sugar
- 7g (2¼ tsp) dried yeast (see note 3)
- pinch salt
Drizzle:
- icing sugar (as much as needed)
- 1 tbs water
Instructions
BLACKBERRY FILLING:
- In a pan, heat the blackberries, vanilla, and sugar together.
- Cook on a medium heat for around 15-20 minutes until the sauce has thickened and the berries are soft.
- Set to one side, and allow to cool completely.
DOUGH:
Bread Machine:
- Add the milk, egg, butter and olive oil to your bread machine pan.
- Then add 400g (3⅓ cups) of flour, and the remaining dough ingredients, taking care to keep the yeast and salt separate as much as possible.
- Set your machine to make dough.
- On a very well-floured surface (the dough will be very sticky) work in just as much flour as you need to make a soft, pliable, but still a little tacky, dough. Form into a rough ball.
Stand Mixer:
- Add the milk, egg, butter and olive oil to your stand mixer, and mix together. If the butter is straight out of the fridge, it won't combine with the other wet ingredients too much, but that's okay.
- Add 420g (3½ cups) of flour, and the remaining ingredients. The dough should be sticky, but add as much flour as needed, a little at a time. Be careful: too much flour will result in dry bread.
- Switch to a dough hook (if you have one) and allow the mixer to knead the dough for around 10 minutes, just until soft. The dough will still feel a little tacky to the touch, but will be able to slowly drop off the hook.
- Cover the dough and leave to proof (until it has doubled in size - usually about an hour).
- When the dough is ready, knock it back, and on a floured surface, form into a rough ball.
FOR BOTH METHODS:
- Roll the dough out into a long rectangular shape with the shorter sides about half the length of the longer sides. Have the shorter length towards you. Most methods for making buns usually state that you should roll the long side; however, this time, I wanted super thick buns and did it this way for that reason.
- Spread the blackberry mixture all over the dough, leaving approximately a 1cm edge all the way round.
- Very carefully, roll up from the edge facing you, as tight as you can, until you have a fat roll. Place the seam facing down.
- Slice into 6 or 8 buns (depending on how large you want them).
- Grease a fairly small skillet or baking dish.
- Place the buns very close to each other. There should be space for all of them to fit in but it will be a squeeze. This forces the bread to rise up rather than spread out, resulting in higher buns.
- Overnight buns: cover the buns with clingfilm, and place in the fridge. In the morning, pre-heat the oven to 200°C (400℃) and allow the buns to come up to room temperature (I usually sit the dish on top of my oven as it's heating up).
- If baking immediately: pre-heat the oven to 200°C (400℃). Cover the buns with a tea-towel, and leave them to rest for around 30 minutes.
- Bake for around 20 minutes. Don't be alarmed if some of them really pop up and the blackberries ooze out - it's all part of the charm. The buns are ready when they are a nice golden brown colour on top.
- Remove from the oven and allow to cool for a while.
DRIZZLE:
- Mix one tablespoon of water with just enough icing (powdered) sugar to achieve the desired consistency (mine was quite runny and needed less sugar but you might prefer a more frosting-like consistency).
- Drizzle or spread all over the buns and serve while they are still slightly warm. Enjoy!
Notes
I have converted grams to cups/ounces/tablespoons using online converters. Although I have no reason to believe they are inaccurate, please be aware that I have not made this recipe with imperial measurements.
- I have made the dough using both a stand mixer and bread machine with identical results. I have not made the dough by hand, but I see no reason why you couldn't do so!
- You can use spelt or regular flour for this recipe (just use the same amount).
- In Sweden we have something called dried yeast. It is used both in warm liquid and allowed to proof, and it is also added directly to flour. I am aware that the US has two options for dried yeast, and I believe instant yeast is the most similar to our dried yeast.
